Whether you’re going camping or just hanging at your house, building a solar oven is a fun summer project for the whole family. And you don’t need to spend a lot of money either! Solar ovens can be designed using everyday materials that you most likely have in your home. Once you build your oven, it’s time to harness the power of the sun to make one of the tastiest treats ever invented—s’mores!
What You’ll Need:
Cardboard box with an attached lid (e.g., pizza box)
Tape
Glue
Scissors or utility knife
Pencil or pen
Aluminum foil
Clear plastic wrap
Wooden skewer or stick
Graham crackers, marshmallows and a chocolate bar
Procedure:
- Use a pencil or pen to draw a square on the top of the box. Make sure there is at least a 1-inch space between the square and the edges of the box.
- Using the square outline, carefully cut a three-sided flap, leaving one side of the square uncut. Fold the three-sided flap back along the attached side.
- Glue aluminum foil onto the inside of the flap. Make sure the foil is as flat and smooth as possible.
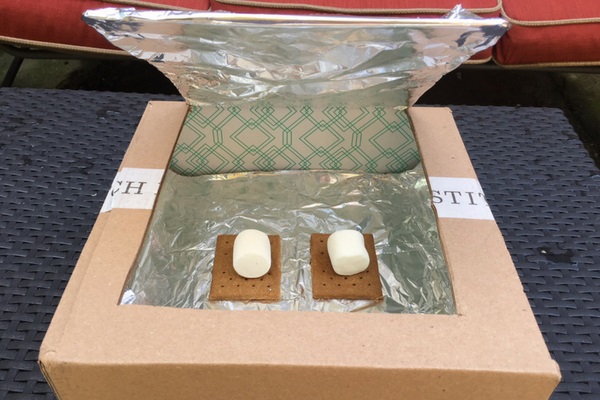
- Line the inside of the box with aluminum foil, gluing it to the bottom of the box and making sure it’s as smooth as possible.
- Place graham crackers and marshmallows inside the oven on top of the aluminum foil.
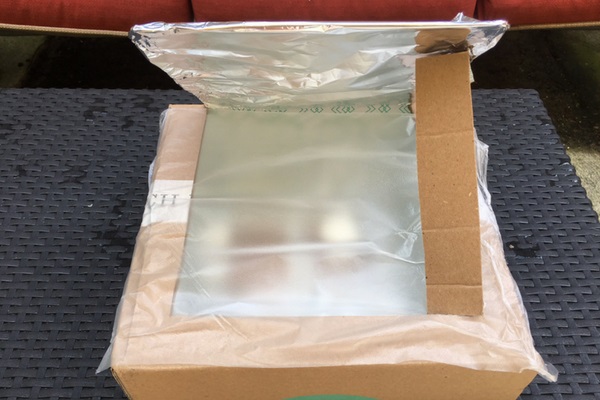
- Use plastic wrap to cover the square hole you created. Then use tape to secure the plastic wrap to the box.
- Use a wooden skewer or stick to keep the flap open. (If you don’t have either of these things, you can also use an extra piece of cardboard like we did!)
- Set the solar oven in direct sunlight and make sure the foil on the flap is reflecting light into the box.
- Cook the marshmallows until they’re squishy (approximately 30 minutes).
- Open the lid and place the chocolate bar pieces and graham crackers on top of the marshmallows.
- Allow your s’mores to cook for approximately 30 minutes.
- Eat your s’mores! Yummmmmmmm.